This feature, which isn’t obvious by the way, lets users take a screenshot of the entire page. It’s hidden in the developer toolbox on Google Chrome but can come in handy anytime it’s needed for this purpose. And it’s very effective too. Just a click does the job, no scrolling down till the end of the page to take a full screenshot. In this post, we’ll take you by hand and show how to take full page screenshots in Google Chrome. It’s a lot easier than you think, and straightforward too. Read through. READ MORE: 6 Google Chrome Features You Probably Don’t Know About.
Take Full Page Screenshots in Google Chrome
Follow the steps outlined below to take full page screenshots while you’re browsing with the Chrome browser.
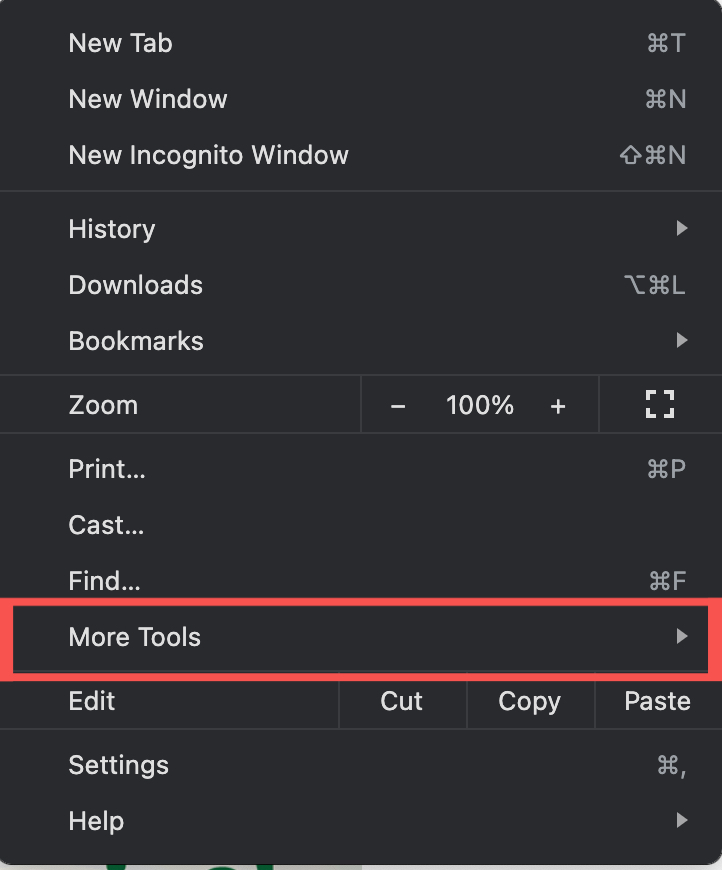
Enter the URL of the page you want to take a full screenshot and open it.Click on the vertically arranged three dotted line located at the top right corner of the page.
Select More Tools.
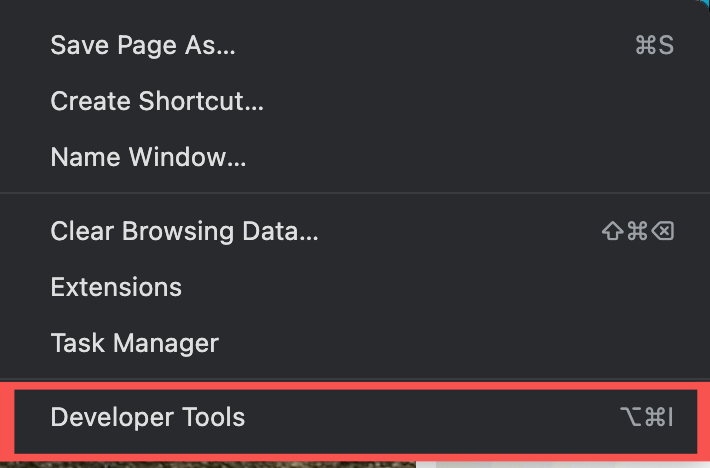
Select Developer Tools. An alternative is to click Option+Command+I on a MacBook or Command+Shift+I on a PC to open Developer Tools.
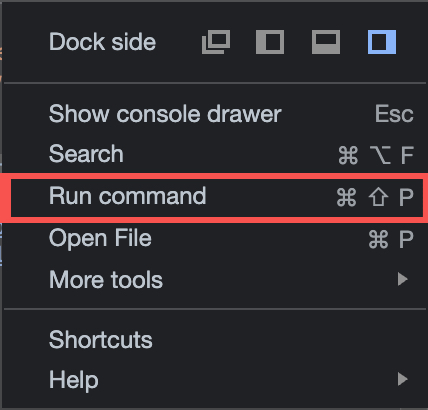
Once a console opens and splits the screen into two, click on the vertically arranged dotted lines at the top right of the console.
Select Run Command.
Scroll down till you find Screenshot and click on Capture full size screenshot.
And… you’re good to go.
Once you follow the above process till the end, you’d see a quick dim of your computer’s light. That shows the screenshot process. Once that happens, your full page screenshot of the page you’re on is automatically downloaded and saved. However, you might also see a prompt to save. If you do, click Save. That’s it. No third-party extensions, no rigorous process. You should try this out and let us know what your feedback on the process is like, in the comments section. And if you get stuck in any step, we’re happy to help.


