Because Google TV is currently available officially in the US alone, to use it in any other part of the world you will need a VPN. A few friends and I use VPNs in Kenya to access Google TV and it works like a charm. Though Google themselves admits that it will take at least 2 years to migrate fully, you can do it yourselves. However, you first need to go through our How To Install Google TV on Any Android TV tutorial To make the Google TV UI your default Android TV launcher, all we need to do is execute a couple of ADB commands via a PC and you will be good to go. You also shouldn’t be worried about committing to a permanent move as we also will explain how you can go back to the original launcher should you need to. Alright, let’s get into it. Also Read: How To Install Google TV on Any Android TV
Step 1: IP Address
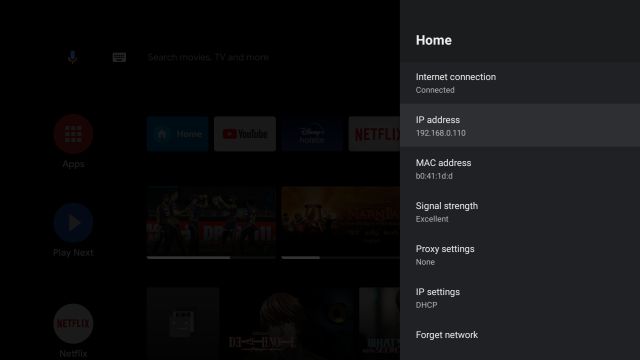
We cannot emphasize enough that you ensure that you have already Installed Google TV on Your Android TV before proceeding with the steps below. To get started we first need to take note of your TV’s IP address. To see the IP address of your TV:
Open the TV’s Settings menuClick on Network and InternetSelect your Wi-Fi networkNote down the displayed IP address
Step 2: Developer Options & USB Debugging
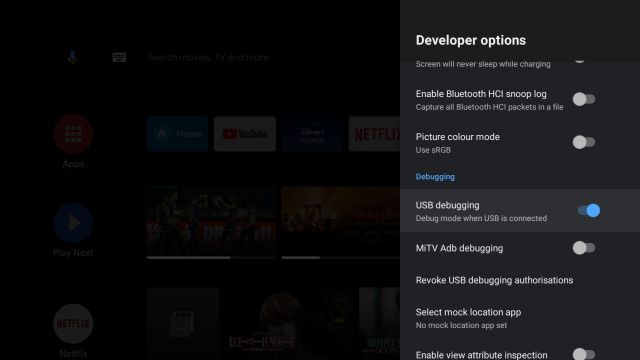
We will now enable a secret hidden menu on your Android TV. Again, open your;
Settings Menu on the TVSelect Device preferencesHead over to AboutScroll down and repeatedly click on Build for atleast 8 times Go back to the Device preferences Click on the new menu item called Developer options Under developer options, toggle USB Debugging on.
Also Read: What is Android TV? 10 beginner’s questions answered
Step 3: Connecting TV to your Laptop
At this point, turn on your computer and install ADB Fastboot Tools. This will work on Windows, Linux, and Mac.
Launch the command prompt as AdministratorExecute the command below where you replace “ipaddress” with your actual IP adress we noted in step 1.
If you do this correctly, a pop up notification will appear on your TV requesting to allow USB debugging. Enable the checkbox displaying “Always allow from this computer” then click OK to allow permission.Your command prompt will now show “connected to IP address” To confirm connection is successful run the command below to display all connected devices
Also Read: Using VPN on your Smart TV: Here are different ways of setting it up
Step 4: Turning Google TV UI To Be The Default Launcher
To remove or disable the current default launcher on your Android TV follow the steps below.
Copy and paste the command below on the command prompt then press enter to run it.
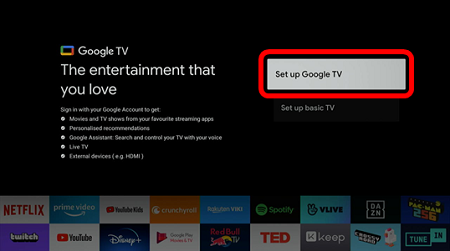
Now the TV will immediately switch from displaying the Android TV homescreen to the new Google TV UI. If it doesnot appear automatically, restart your TV and it should work.With the Google TV appearing as the default launcher, we now need to go through the Google TV set up Wizard, only this one time. For that, press the home button on your remote.
Follow the on screen instructions to complete set up.In case your Google TV setup wizard doesnot appear, you will get a prompt to choose “TV Home” as default homescreen app. Choose always and your Google TV setup Wizzard will appear.You can now go ahead and enjoy your Google TV!
Also Read: What’s new with Chromecast with Google TV streaming device
Step 5: How to Restore the Android TV as Default Launcher
In case you do not find the google TV UI appealing or yours is buggy, you may want to revert to the Android TV as the default launcher. All you need to do is
ensure you are connected as in step 3 via wireless debugging.Open command propt on your PC and run the command below then restart your TV and you will be back to Android TV
You may even want to uninstall all the apps we had previously installed to freeup some space on your TV.
That’s pretty much it, hopefully, this step-by-step guide was of much assistance to you. In case anything is not clear, kindly feel free to leave a query in the comments section below. Also Read: Top 10 Free and Paid VPNs for Fire TV


