But then, we already have fairly capable devices with us, our smartphones. As such, you’d be glad to know that you don’t have to do that anymore. The Notes app on your iPhone can come in handy when you need to scan a document. In this post, we’ll take you through the steps you need to take when you want to scan a document with your iPhone Notes app. This post should mark the end of your many trips to the cyber cafe. READ MORE: 5 Best Alternatives to the iPhone Notes App.
Scan Document With iPhone Notes
Follow the steps below to scan a document with the Notes app on your iPhone.
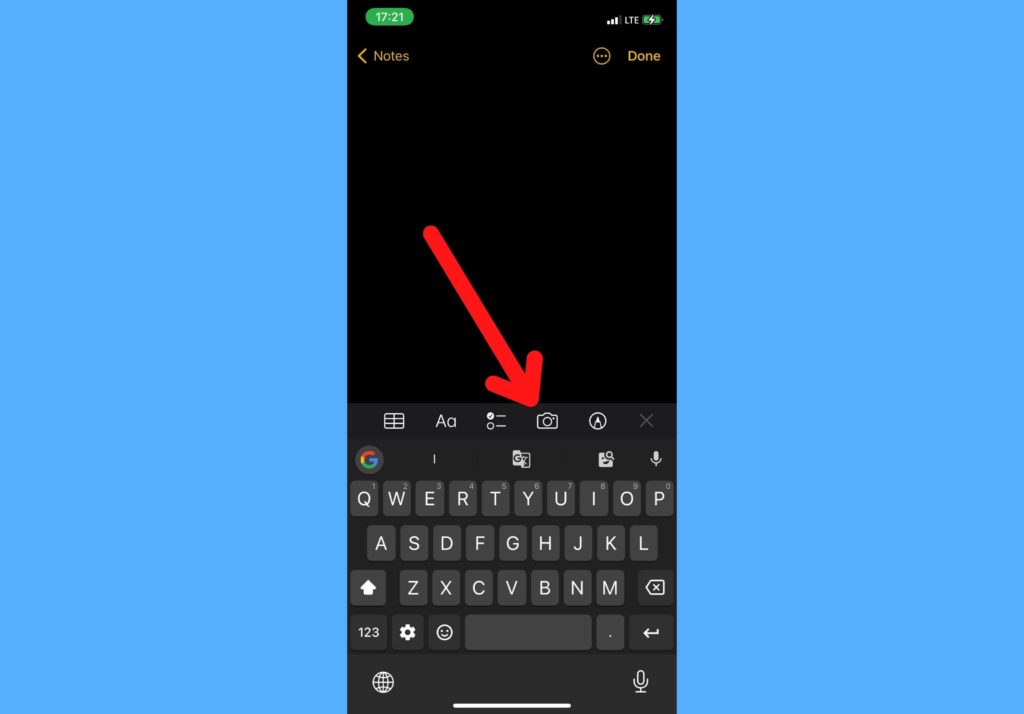
Open the Notes app on your iPhone.Select an existing note or create an entirely new one.Tap the camera button located a the bottom of the screen.
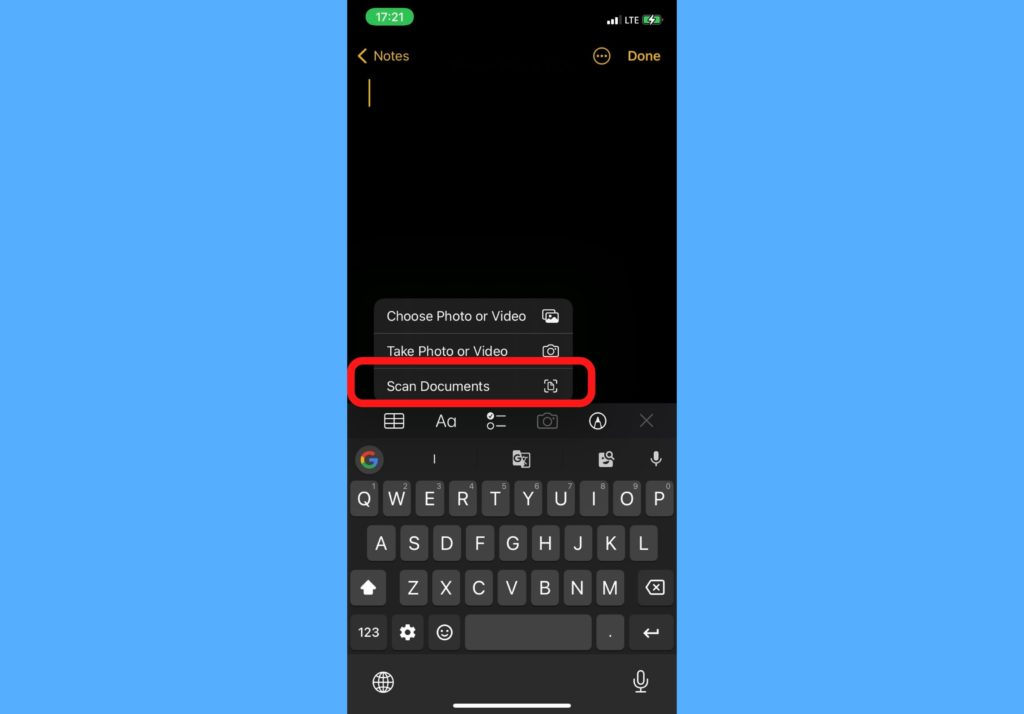
Select Scan Documents.
Place the document in view of the camera.
Your document will automatically scan if your device is in Auto mode. If it doesn’t, you will need to manually tap the Shutter button. Drag the corners of the captured scan to fit the document.Tap Keep Scan.
Read More: How to Share iPhone Notes With Other People
Tap Done.
Once you are done scanning a document, you can go ahead to share it with others. This can be done by either sharing the file you saved with the person on their preferred platform (WhatsApp, Telegram, Facebook e.t.c) or sharing the Notes where it was created with them. Follow the steps in this post to learn how to share iPhone Notes with other people. Did this work? Do you think I left anything out? Is there something else around scanning a document with your iPhone you’d like me to cover? Please use the comments section to let me know and I’ll get to that very soon.
