For those seeking to take the plunge today, we have taken the liberty to curate the process you have to take to get the letter of confirmation from NIRA. We’ll keep this guide updated over time as new information regarding offices where you use the letter unfolds or changes, allow us to do your research for you.
What Is the NIRA Letter of Confirmation and Where Can You Use It?
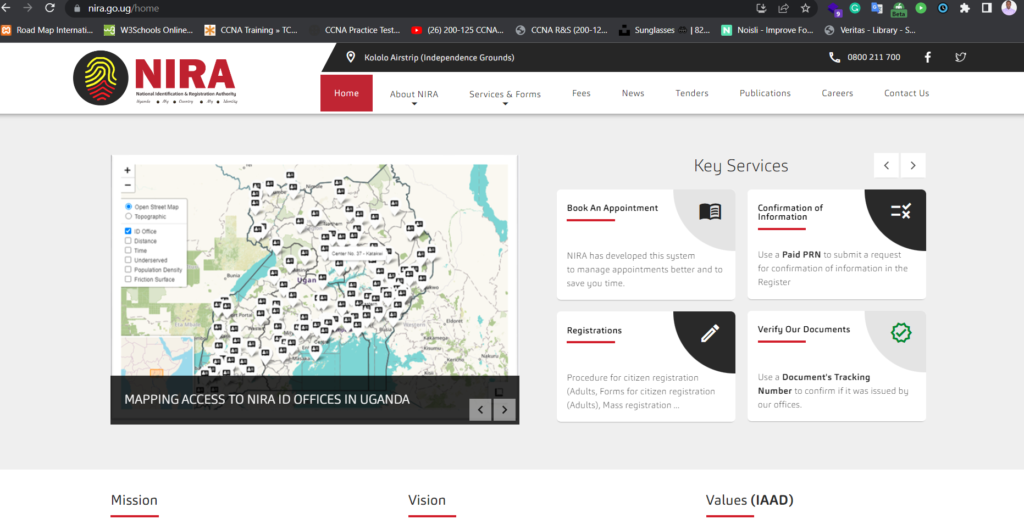
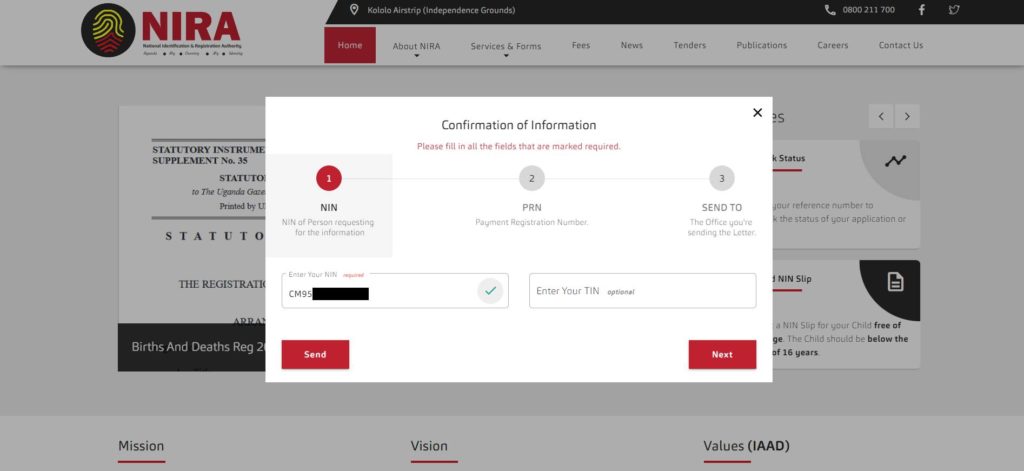
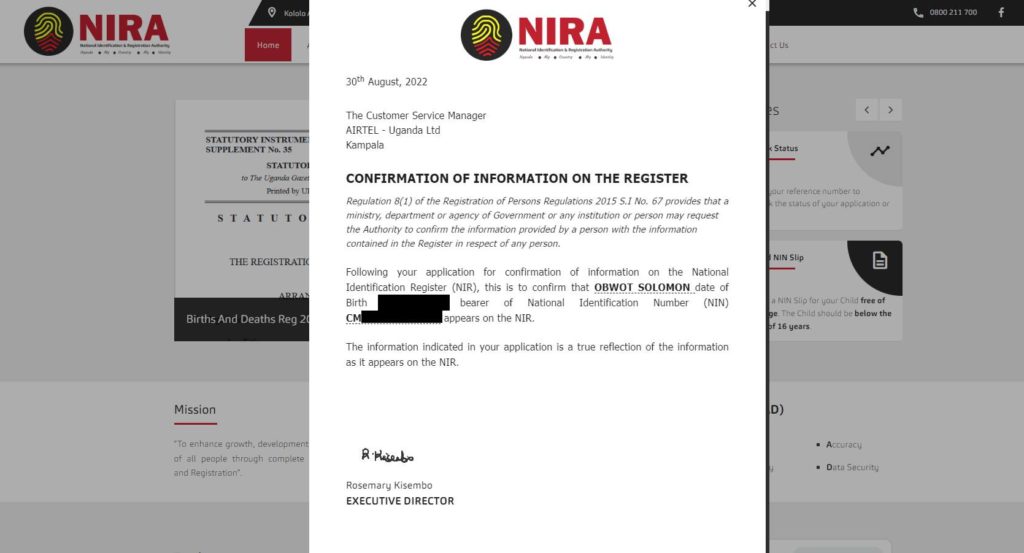
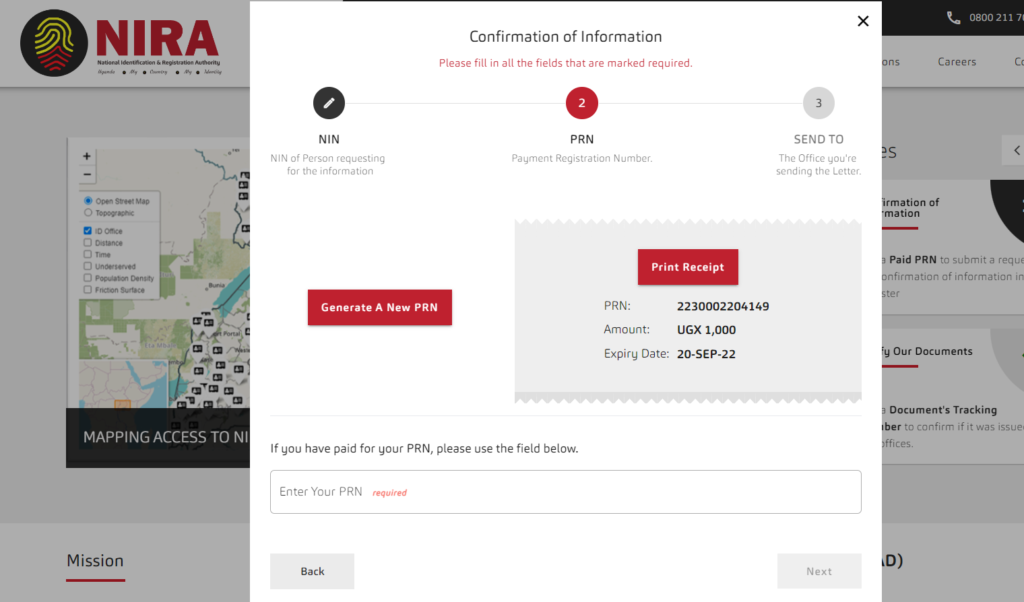
For the uninitiated, NIRA is an agency mandated to create, manage, maintain and operationalize the National Identification in Uganda. Their letter of confirmation provides you with a verification that the information you indicated in your application is a true reflection of what appears in the National Identification Register. This confirmation of identity letter can be used for a replacement of your SIM cards, getting a bank account, applying for a letter of good conduct from INTERPOL, other government offices, universities, and more. Let’s get into how you can apply for that letter online; Step One: Head over to NIRA’s official website, www.nira.go.ug. On the home page, there is a slider on the right-hand side with a list of Key Services. Click on “Confirmation of Information” to open a modal. Step Two: Enter your National ID Number (NIN), and click Next to go to generate a “PRN” (Payment Reference Number). The fee for the PRN is UGX 1,000. Make payments through mobile money and select the office you want to address the confirmation letter to. Step Three: For SIM card Replacement, select the telecom company you want to renew its line. Either MTN or Airtel, choose the service center location and download a copy in PDF format. Print and carry this letter when visiting your nearest service center to have your SIM card replaced. Here is an example of the confirmation letter I used to get my line replaced at the Airtel service center. READ ALSO: How to Apply for a Certificate of Good Conduct Online From Interpol Uganda?
How to Pay for URA’s PRN Using Airtel and MTN Mobile Money for SIM Card Replacement?
PRN is a tax code identifier by URA and once generated on NIRA’s website can be paid through mobile money. Here is how you can pay for your PRN through MTN and Airtel money. Step 1: Dail *165# or *185# and select Option 4 of “Pay Bills” with Airtel money. On MTN, choose option 4 “Payments” Step 2: Choose Option 7 to Pay “URA” on Airtel money and Option 2 to “Pay with PRN”. On MTN MoMO, select Option 5 to pay “Fees and Taxes” and Option 1 “URA”. Enter your 13 digits PRN number. Details about your transaction will be displayed. Step 3: Confirm your transaction by entering your mobile money PIN and you are done. And this is our guide for getting your letter of confirmation from NIRA. Did you know you could use this letter to replace your SIM card? Share with us in the comment section your experience or if you will try it out.
