Luckily, for a long time now, Microsoft has had a native zipping utility built-in to the Windows operating system, eliminating the need for third-party programs and software to manage zip files. In the paragraphs below, we’ll talk about how to create zip files in Windows 10, how to unzip a file and how to edit zip files.
How to Create Zip Files in Windows 10
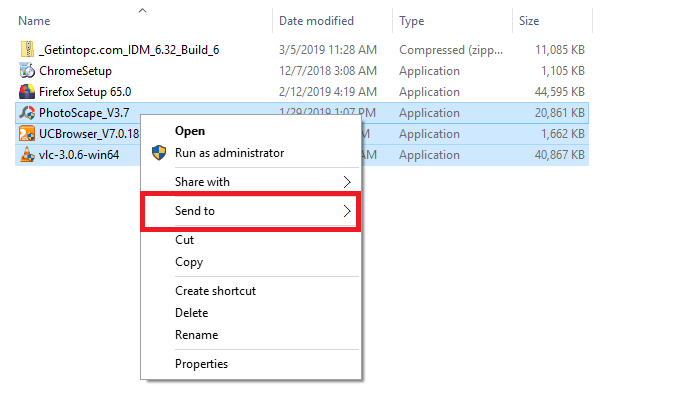
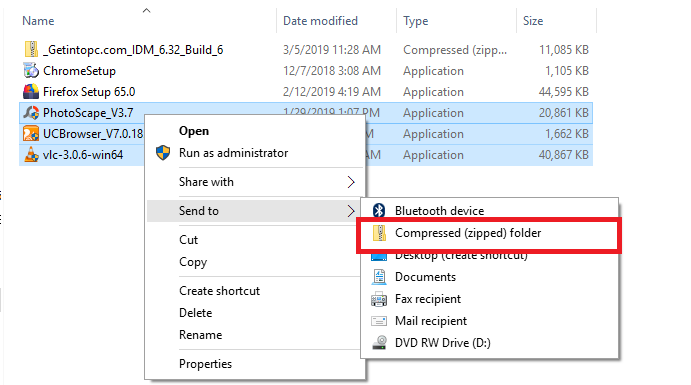
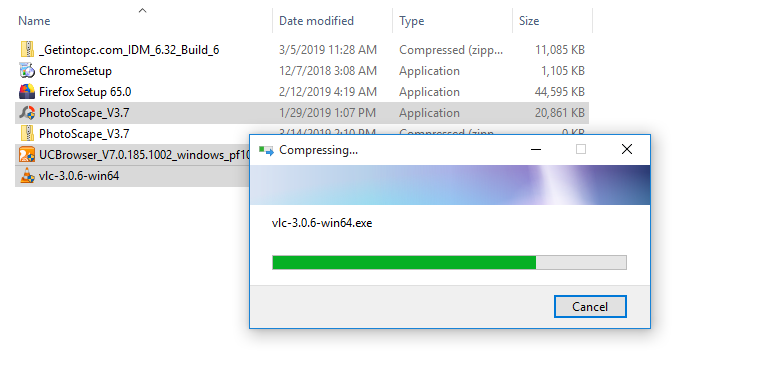
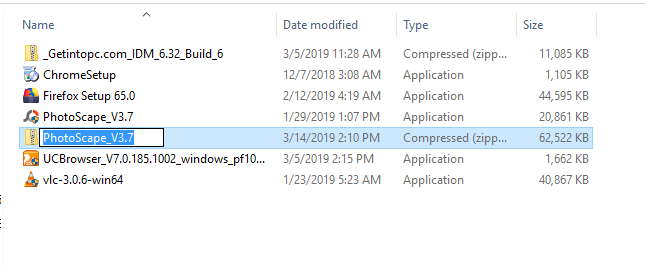
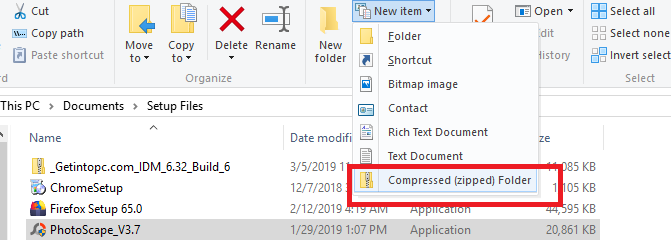
1 Open your PC File Explorer (Windows Key + E) 2. Go to the Folder containing the file(s) you want to zip 3. Right-click the selected file(s) 4. In the pop-up context menu, click on “Send to” 5. Click “Compressed (zipped) folder” 6. Windows begins to compress the files into a .zip folder 7. Once the files have been zipped, Windows prompts you to give the folder a name or stick with the generated name. Alternatively, From Step 3 above,
- Select the files you want to zip
- Tap “New item” in the Ribbon menu
- Click on “Compressed (zipped) folder“
Unzipping a File
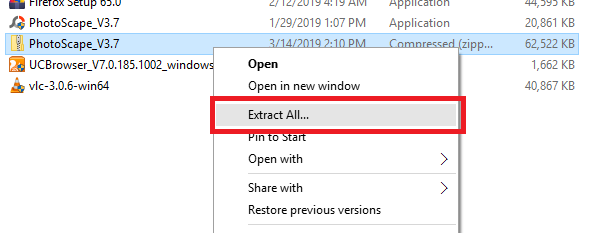
To unzip an entire folder; 1 Launch your Windows 10 PC File Explorer (Windows Key + E) 2. Select the folder you want to unzip 3. Right-click and select “Extract All” 4. Select the destination/folder path you want the files in the zip folder to be extracted to. 5. Click “Extract“ To unzip a single file;
Adding Files/Folders to an existing Zip Folder
Finally, you can add files and folders to an existing ZIP file simply by selecting the ones you’d like to add then dragging them on top of the ZIP file.
